
Your personal GitLab account
Link your GitLab account to a workspace so your hotfixes and merges carry your name, with your own permissions.
Checked in the application on September 5, 2026
By default, everything Deployer writes to GitLab is written by the workspace’s service account: the token of the GitLab connection. A hotfix merge request is then opened by the bot, unassigned, and the GitLab history never says who, in the team, decided. Linking your personal GitLab account changes that: the actions attributable to you go out under your name, with your permissions.
Who can ViewerProduct ownerDeveloperManagerAdministrator
Linking your account is a personal action, open to every role: it grants no right in Deployer. A viewer can link theirs; they still cannot create a hotfix. The configuration of the GitLab application that makes linking possible is, for its part, reserved to the workspace administrator.
What goes under your name, and what stays with the bot
| Action | Who signs | Why |
|---|---|---|
| Create the hotfix branch and carry the commits onto it | You | The commits carry your name in the history. |
| Open a hotfix merge request | You | You are its author and assignee: you are the one GitLab notifies. |
| Merge a hotfix merge request | You | Merging is a decision, not a mechanism. |
| Validate the merge requests of an issue | You | Same reason, at the issue’s scale. |
Create the release/* maintenance branch | The bot | Often protected by a wildcard rule: infrastructure. |
| Deploy, create a version, retry a job | The bot | Deploying unprotects and recreates branches, writes project variables: rights a developer should not have. |
| Every read and background task | The bot | No user in the context. |
Linking your account
- Open the screen
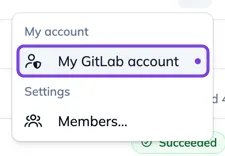
In a workspace, the “Menu” button of the tab row carries “My GitLab account”, with a dot when a link is possible and not done yet. If no application is configured, the screen says so: “An administrator must declare the GitLab application first. Until then, everything goes through the service account.”
- Read what you are granting
Deployer will act on your behalf across the whole GitLab instance, with your permissions: GitLab offers no narrower authorization that covers its API. You can withdraw this authorization at any time, here or from your GitLab settings.

- Link
“Link my GitLab account” opens GitLab’s authorization page, then brings you back here: “Linked to your username, since …”. Deployer keeps no password, only the authorization GitLab issued, renewed on its own.

- Unlink, or link again
“Unlink” revokes the authorization in GitLab; your hotfixes go back through the service account, if it is allowed. When GitLab refuses to renew the authorization (revoked from your account, for instance), the screen shows “Link needs renewing” and a “Link again” button.

What the screen says at the moment of acting
Before creating a hotfix or validating an issue, the panel says under which account the action will go: yours, or the service account. If your account is not linked and the workspace does not allow the fallback on the bot, the button points to this screen rather than failing. If the fallback is allowed, the panel says so before the action and in the result, because the bot often bypasses the approval rules the screen has just shown.
For the administrator: making the link possible
Who can Administrator
Linking requires an OAuth application declared in the workspace’s GitLab group, with the api scope and nothing else. It is set in Configuration, GitLab connection section, “Personal GitLab accounts” block: the redirect URI to copy into GitLab, the application ID and secret, and the “Act as the bot when no account is linked” switch. The step by step is in Configure a workspace.